Calontir Clothing Challenge III - Kirtle
- A

- Feb 1, 2021
- 7 min read
Kirtle, Cotehardie, Fitted/Supportive layer, whatever you want to call it - that middle layer was my next step, and it was HARD. It required drafting a well-fitted garment with inset sleeves from scratch. I managed to find a couple of tutorials and books to help, but they all start with the recommendation that you have a friend drape it - not a great option during a plague.
I didn't take many pictures while I was attempting to draft the pattern. While I think that there is value in seeing others struggle and not get it perfect on their first try, I don't exaggerate when I say that I don't know what I'm doing. I don't want to risk inadvertently sharing bad habits because I don't yet know that they are bad habits! However, I will say that I experimented with a couple of things that I think were okay, and I'll share them.
I've started using tissue paper for the drafting process since it's relatively sheer, and I happen to own a decent-sized rotary cutting board with a ruler grid. If you tape the paper down onto the cutting board you can use the squares on the board as a grid line to help you keep your ruler parallel or perpendicular to any other lines that you need to draw, and to help you measure. (Note, this only works if your cutting board is big enough to accommodate you (about half your bust measurement) and you may need to tape a few sheets of tissue paper together because they're not that big once you start trying to draft bodice or sleeve pieces on them - I may have to source some heavier duty paper and retrace the more successful pieces to preserve them a bit longer.
I cut the armhole WAY too big and had to keep adding fabric back in to make it tight under my arm again.
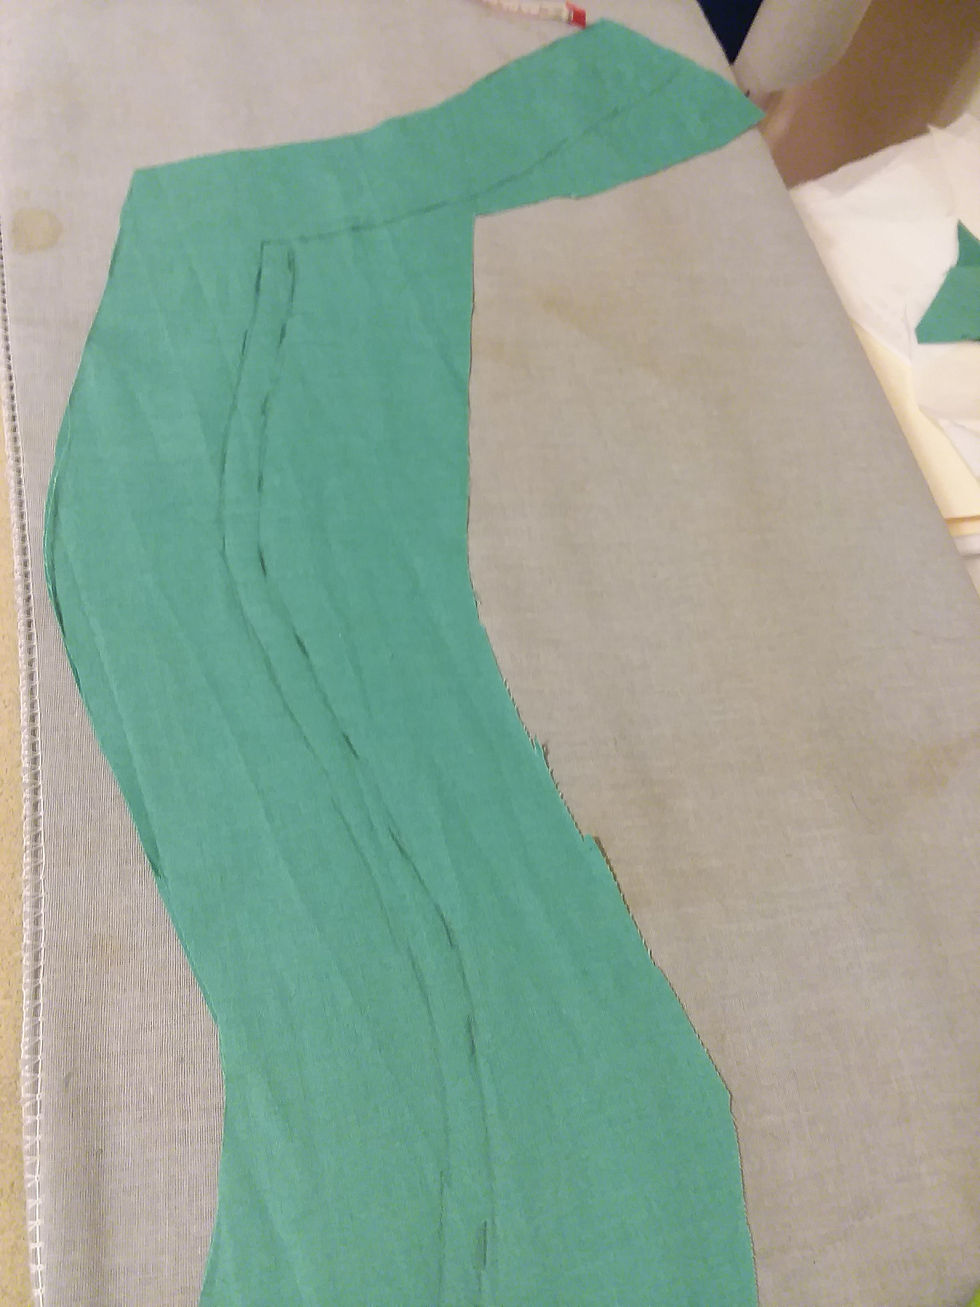
After getting very flustered by some directions for using math that didn't add up to draft the sleeves, I got creative. I traced the armhole directly onto a piece of paper and used that for my sleeve cap. It's not perfect, and could certainly use a few more fittings. However, it fits in the armscye, and that makes me happy. It was too tight in the bicep, so I tried adding a little extra room in the bicep of the arm, but somehow that added an extra half inch to the sleevecap? I'm still not sure why that happened, I just know that I had to find a way to remove it again later on.
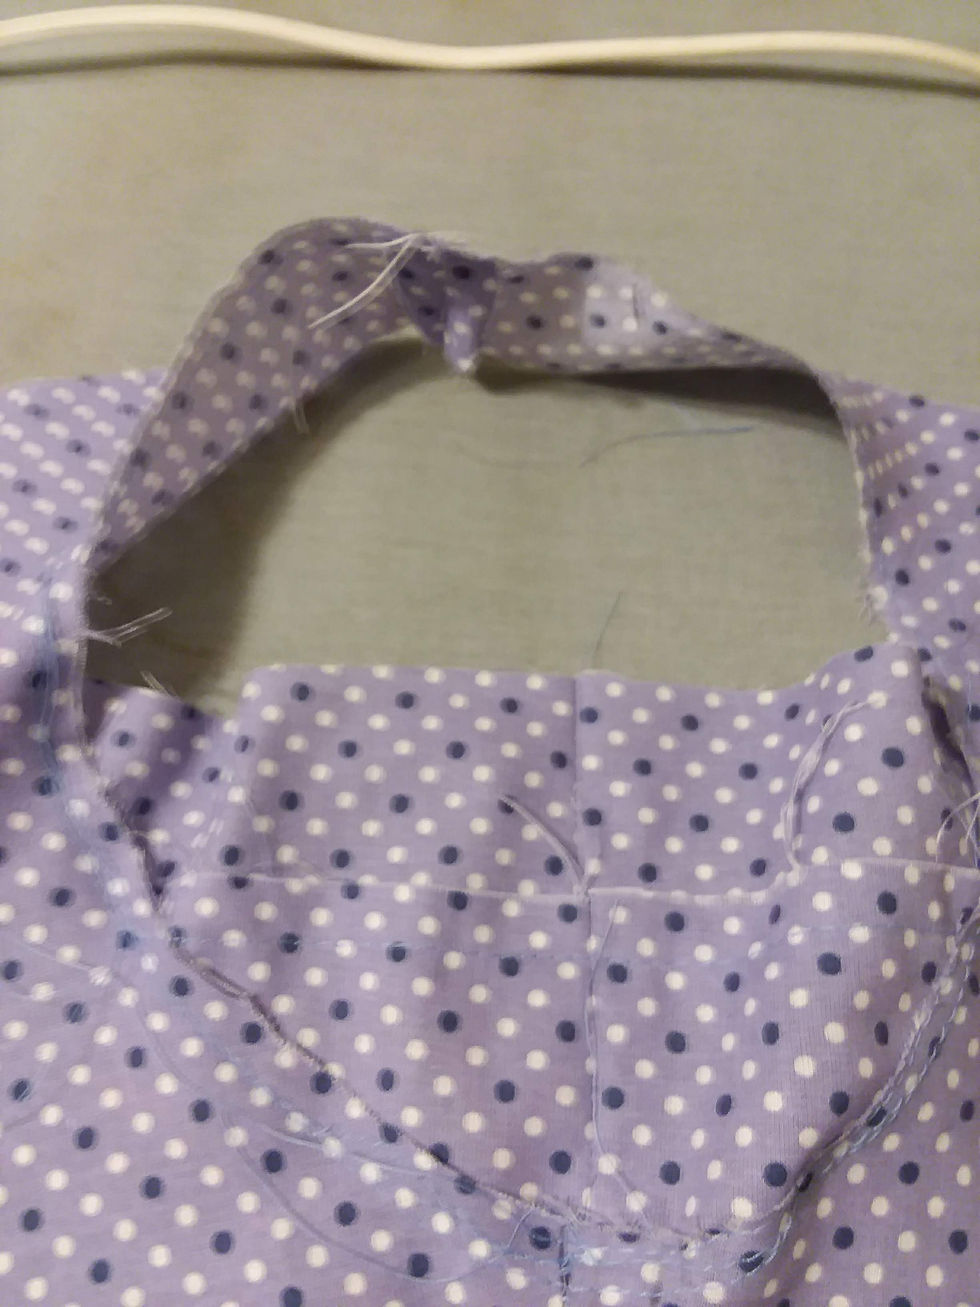
I made a super colorful muslin with a purple polkadot calico and green gores and sleeves, but I forgot to take a picture of it before tearing apart the seams to trace onto my green fabric. D'oh!
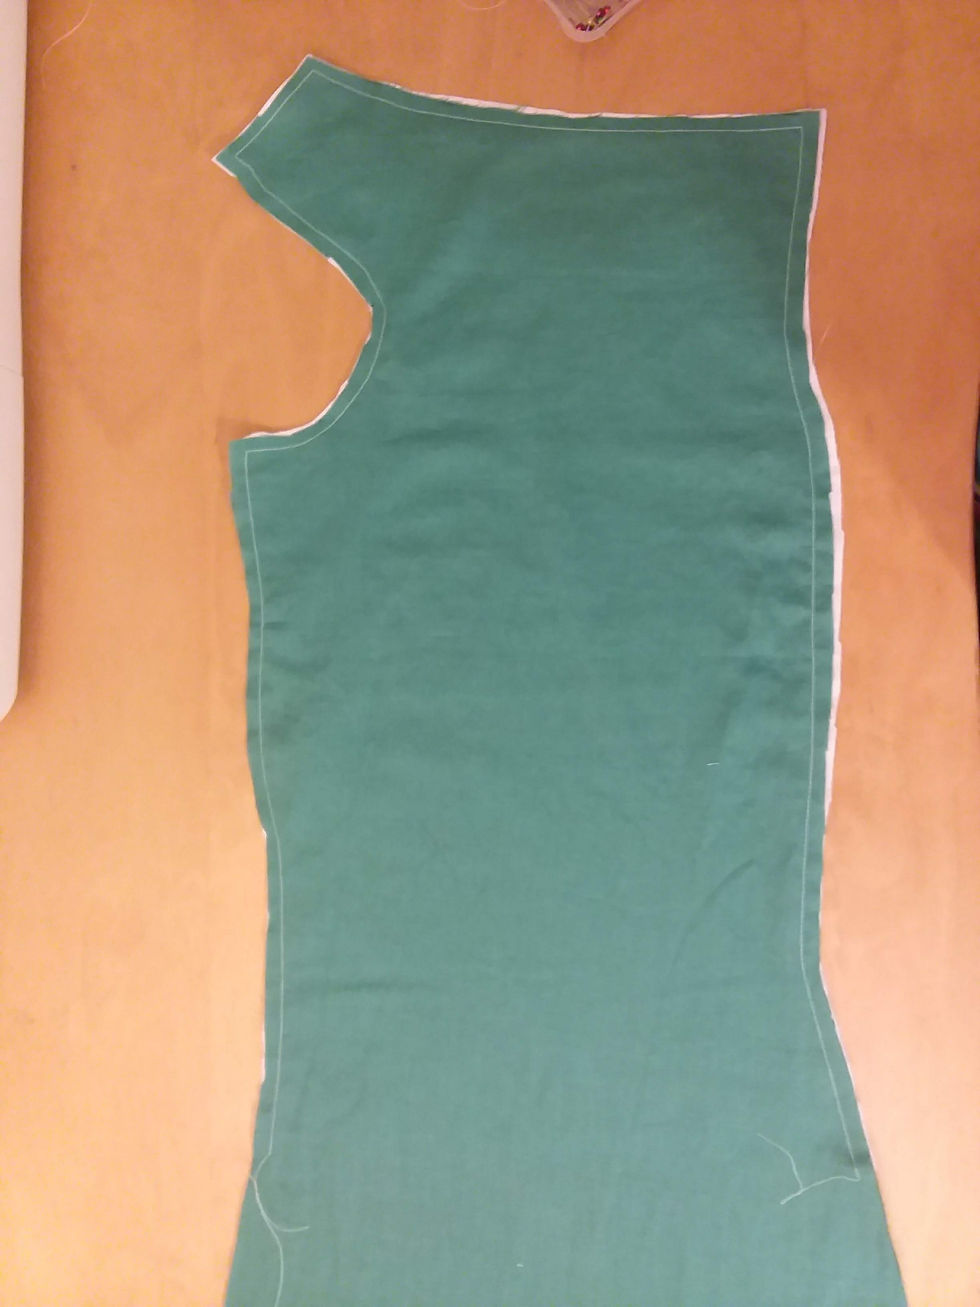
Cutting the fabric went quickly. I decided to omit the gores and just cut the panels as wide as the fabric would allow. Unfortunately, I was a little too tired when I did this - I left the side gore attached to the front and not the back panel (instead of cutting it in half and adding a seam allowance as I did at center back), which left the front panels cut at very different angles than the back panels. I'm concerned that these are going to end up hanging at very odd angles when all is said and done. I considered cutting them down to the same angle, but then I might not be able to fit my hips, and that's just not okay. Oh well, lesson learned for next time!
After cutting out my panels and sleeves the next step was to flat-line the bodice pieces. I quickly realized that despite having 4 1/2 yards of material, I did not have enough of the green fabric to line the dress, but I could probably squeeze out some facings. However, I still had plenty of the white muslin from the chemise layer. It only took about 2/3 yards of the muslin, and I was able to align the pieces so that the hem of the pieces fell along the selvedge thus saving myself the effort of hemming them. This was one of the first, if not the first, project that I've flat-lined. I like how the white contrast looks. I've seen it in many others' projects and it makes me feel like I've hit a new level in my sewing. I'm also hoping that because it's flat lined I'll have some more flexibility in adjusting the fit. I'm always struck in these historical sewing groups how there is this idea that clothes must perfectly fit the wearer (and yes, it's awesome if you can create a perfectly tailored fit), but people fluctuate in size...what did people do historically if they gained or lost weight? I don't think that average people were constantly drafting new clothes; they probably had to adjust the clothes that they owned (or that they acquired from others).
Lots of flat-lining.
I'm getting off track here. Another advantage of the flatlining is that it basically finishes my edges for me (a basting stitch around the edges is as good as I get), and it takes care of the stay-stitching that I wanted on the neck and arm holes. As I was playing with the muslin I noticed that the armholes especially were getting stretched out as I was trying it on and had made a mental note to baste around those edges.
You may notice some weird stitching on one of my panels. At first I thought that the tension had gotten out of whack while flatlining my first panel, but closer inspection revealed that it was just that the bobbin hadn't been properly inserted into the casing. Phew! I was more than a little relieved that my machine was still working properly!

Next step was to attach front and back panels over the shoulders and at the side seams. Initially I just stitched from the armpit to the hip because I was going to match the seams. That didn't quite go according to plan, but I paused at the hips for the moment.
Then I basted around the sleeves - these were not lined - and closed up the seam. I'm not sure if it was just a trick of the light or if the front and back of this fabric were slightly different shades of green. I was also afraid of ending up with 2 sleeves for the same arm and none for the other, so I made sure to clearly mark to the 'wrong' side of each sleeve with chalk.


Sleeves could now be attached to the armholes, I traced balance marks for the top, center front, and back seam to the sleeves and armholes. I tried to mark the bottom of the sleeve as well, but I somehow ended up with 2 marks, and I'm not sure which one was accurate, so I had to improvise. I also ended up with an extra half inch of fabric in the sleeve cap after widening the bicep that wasn't in the original sleeve. Again, I'm not sure what happened there, but I carefully folded it in and hid it in the seam.

Now it was time to sew down the side seams. It's uneven, but the side seams are attached. This made me realize that the skirt sides were pretty much the only unfinished seams left in the whole garment, so I basted them at about 1/4 inch to prevent any future fraying. Ideally the seams would have been cut at the same angle and gores added, but I didn't have enough fabric to cut gores, so I had to make do.
Next step was to finish the edges on the front and back skirt panels. This could have been done after the seams were sewn, but it's easier to do it before they are attached to seams.

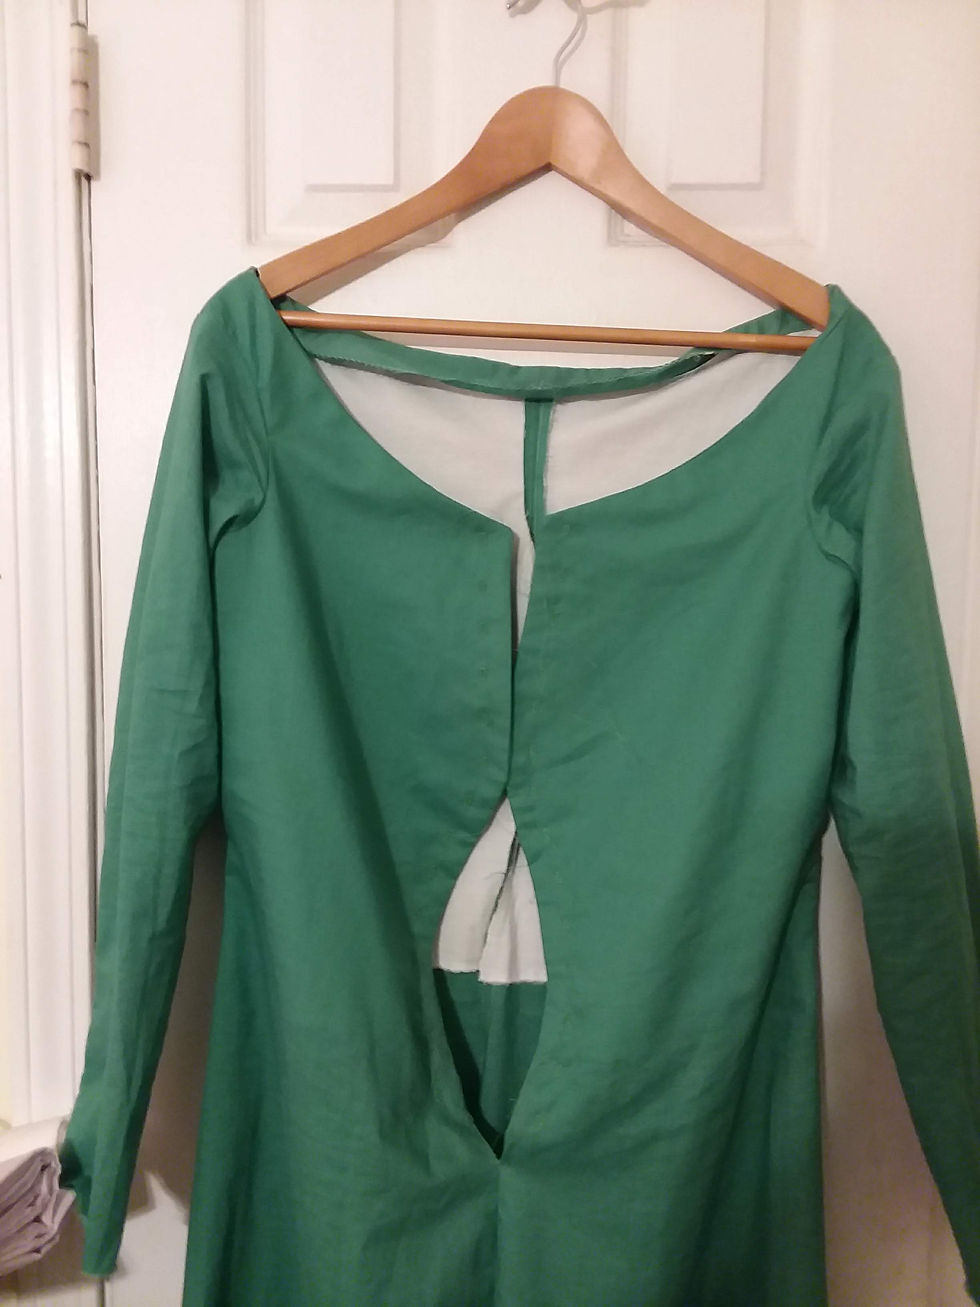
I sewed the back seam up, and what do you know? It's starting to look like a real dress!
Time to start work on the facing. I traced the the shape of the gown, and added about two inches to account for seam allowance and room for the facing to hide the contrasting lining. You can see where I was playing with the pencil lines and opted to add a bit more room to the facing down the front before cutting it out - just in case. I also decided to add some mediumweight fusible interfacing to the front portion of the facing. This is obviously NOT period, but since I entered the challenge as a 'modern recreationist' I used the only technique that I know would have any chance of helping to reduce bunching along the front of the gown once it's laced.


Speaking of lacing, that was my next step. I think my only complaint with my sewing machine is that it is incapable of sewing an 'eyelet' hole; it can only sew a rectangular buttonhole. However, buttonholes work just fine for lacing up dresses! So it just becomes a matter of terminology rather than an actual problem :) I do love my sewing machine.
I didn't have the patience to hand-sew all of these eyelets, so I used my machine, and I think that they still came out just great.
I did hand-stitch the neck facing, sleeve hems, and skirt hem though. I didn't bother with the facing along the front of the gown - if the buttonholes don't hold the facing in place then nothing will. I finally purchased a thimble, which was a huge help for my middle finger on that hand stitching. It's still a little bit awkward since I'm not used to using it, and frequently found myself trying to use my ring finger instead of my middle finger since the thimble makes my middle finger slightly more awkward. It definitely takes some getting used to, but I think that it's worth it.
I also received a couple of brass hand-sewing needles from TheFairyTalesChest on Etsy through a subscription box that I tried for the hand-sewing on this project. Sewing with brass is different than steel. The first thing I noticed was that the needle was much wider in diameter than the needles I am accustomed to working with. I was concerned that this might impact my sewing, but it slid between the threads of the fabric very well. the second thing I noticed was that the brass was much softer than steel so not only was the needle not quite straight to begin with, it constantly seemed to be bending ever so slightly this direction or that. I hope that the frequent bending doesn't cause the needle to break, but it worked just fine while I was using it. The slip stitches I put into the hem seemed to virtually disappear almost as though the thicker needle helped to pull the threads toward the back of the fabric allowing the hemming thread to sit across the surface of the fabric rather than lie on top of it. It's hard to describe, but it looks great.

Anyway, enough stalling, here's the dress, completed 12/31/2020!
What the item is: Supportive Kirtle
How it fits the challenge: Green (March) - The fabric is green
Material: Green Cotton ~4 1/2 yards; White muslin ~2/3 yard
Pattern: Self-Drafted from several resources, especially Morgan Donner's Video
Year: circa 1400-1425
Notions: Thread, Lacing Cord, ~8in medium weight interfacing
How historically accurate is it? About 75%
Hours to complete: 15 1/2
First worn: Photo Shoot 1/31/2021
Total cost: Green Fabric ($13.48)+Green Thread ($3.99) =$17.50 plus taxes and stash ~$20-$25


Comments