Dresser Glow-Up
- A

- Jun 21, 2022
- 4 min read
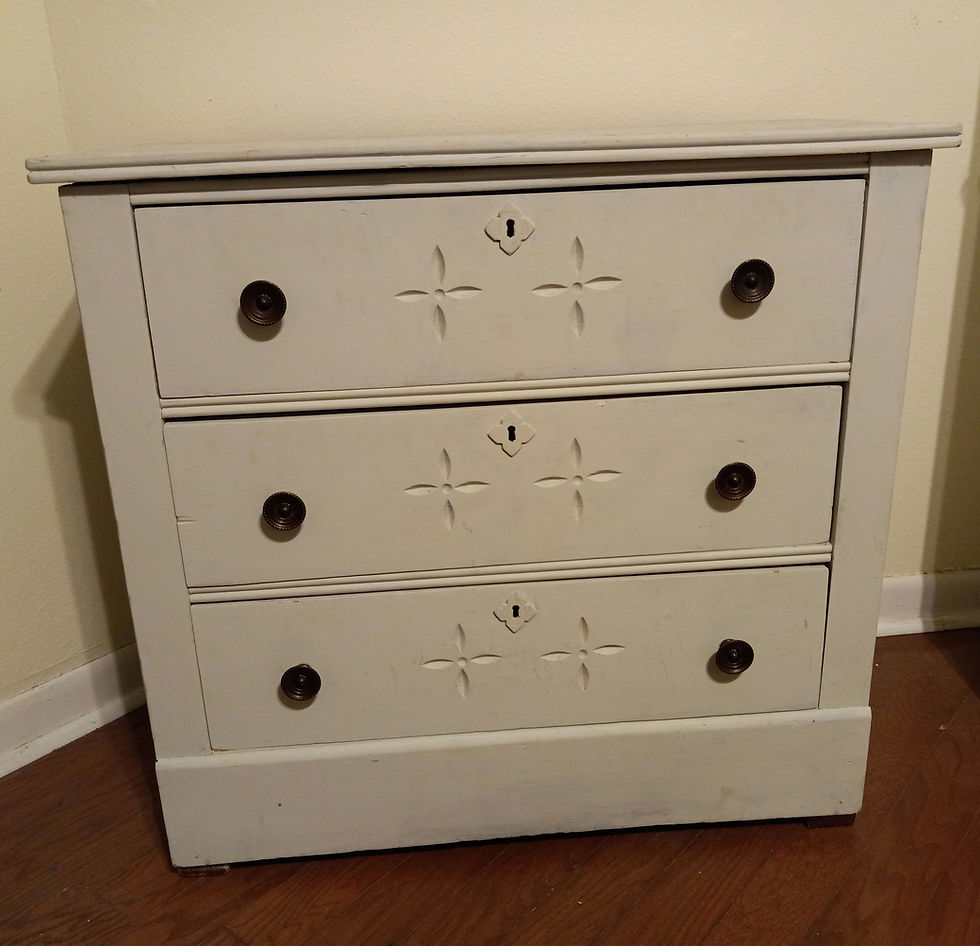
This project started when I found a cute dresser on the side of the road. It was the palest shade of green, so subtle that even in the sun it almost looked white. The drawers also had these beautiful floral designs cut into the wood. Upon closer inspection I saw that the drawers actually had a wooden base rather than the flimsy Masonite bottom that most are sold with today. Since it was still waiting as if for me a few hours later I decided to take the dresser home.

As with any used furniture acquisition, my first step was to clean it. I wiped the whole thing, inside and out, with disinfectant wipes. This had the added bonus of removing a few minor stains as well. While cleaning I learned 2 things. Number one, this piece had to have been handmade. Number two, it needed a little wood glue. Fortunately I had the latter in my tool bucket left over from last year's Inkle Loom. I reattached a drawer stop, a rail, and reset one of the drawer bases back into its groove. Easy fixes that made me glad for supplies already on hand.
And then I started scrolling Pinterest and looking at all of the cute dressers on there and wouldn't it be cool to try that some day, and oh hey, wait a minute, I just found the perfect dresser for one such experiment! I settled on the lace stencil design because that one really piqued my interest.
I started checking out tutorials, and found 2 techniques. One involved putting lace on the surface to be painted, applying Mod Podge over the lace to hold it in place, and then painting over the Mod Podge layer before peeling off the lace. This sounded like a really good way to mar the new paint surface to me - wouldn't peeling off the lace also peel off the MP and the paint on top of it? The other technique was to simply apply I lace to the surface, tape it on the back to hold it in place, and then remove the lace. This made more sense to me.
Both methods recommended using spray paint. This surprised me a bit as I wasn't sure if it would provide an even coat, but I also didn't know if other methods like a roller or brush would over-saturate or move the lace and distort the pattern. Therefore I trusted the tutorials and purchased some spray paint. I decided to go with blue and tried to get a light to medium shade. I wanted something dark enough to show up on the green, but light enough that I could totally paint over the whole thing if I changed my mind.
Time to start removing the drawer pulls and taping the lace in place. I'd planned to do a test run to see if I could reuse the same piece of lace on all 3 drawers if necessary, but I ended up having enough scrap lace laying around that I was able to do them all at once and test the whole thing on my first try!
Lace is taped in place. I was even able to keep the motif in roughly the same spot on each drawer. I centered it relative to the faux keyhole. And onto the main event, the painting:
The first two are in the sun because they are freshly painted; the two in the shade represent me coming back a few hours later to check on them and see if it worked. You can also see where more tape just gave up in the heat and feel into the grass. I'm not going to lie. There was a point here where I definitely didn't think that this was going to work at all and I'd need to find a different way to decorate my new dresser. Time for the first reveal!

It worked! It actually worked! I have lace-stenciled drawers!

This is definite progress, but knobs would be helpful for, you know, opening the drawers, and I probably should put liner in the drawers. Off to Lowe's...
Okay, so technically there's nothing *wrong* with the handles, I'm just not a bronze person. Ideally crystal knobs would have matched my vision, but they were $4 a pop. Silver was my second choice, and came as low as $.79, aka 6 for $5. To make my choice even easier they had at least a dozen of the silver knobs in stock, and exactly one of the crystal. I briefly contemplated a different silver knob in the $2 range, but then determined that after my time at the store neither I nor anyone else would spend enough time looking at it to make it worth the upcharge.
The contact paper liner only came in 20 inch widths, which was almost wide enough to cover from front to back of the drawer. Sadly it was only as I was cutting it to size that I saw the note about how it wasn't suitable for sticking directly to raw wood. Oh well; I was able to fold it into a little box that nestled inside each drawer instead.
Now that the liner was in place I could attach the knobs. I used a sewing pin to poke a hole from the front of the drawer through to the paper and widened the hole with the screwdriver.

Time for the final reveal! Once more, the original dresser and then the glammed up version:


The Challenge: n/a
Material: Wood
Pattern: n/a
Year: 2022
Notions: spray paint, lace, duct tape, shelf liner, knobs
How historically accurate is it? n/a
Hours to complete: 3 3/4 hours
First used: June 2022 to house linens
Total cost: $6.50 paint + $5 knobs + $10 paper = $26.50


Comments